

Introduction
Want to farm those pips? Want to gain WXP from your own efforts? Want to cause wanton havoc all on your lonesome? Don’t want to follow a tag, even when they urge you to?
This guide is for you!
Welcome to the concept of roaming in World vs. World. For the most part, WvW is geared towards fighting in large-scale battles of 10vs10, 40vs40, 80vs80, or even 1vs80 (as it may feel like sometimes). This is due in part of the vastness of the maps and the difficulty it is to try to capture the various points in the maps.
These points in order of difficulty (in ascending order) are sentries, shrines (found only in the Desert Borderland), camps, towers, keeps, garrisons, and finally Stonemist Castle (SMC). (”Middle Fort” or “Center Tent” for those who want to be incorrect/sarcastic.) The first three tend to be the sites that roamers have little to no difficulty in capturing solo. Towers are a mixed bag depending on which tower, player skill, time of day, and how fortified it is (more on that later); they range from solo-able to impossible without a group of eighty, depending on these factors. Keeps, garrisons, and SMC are in a similar boat as towers, but the difficulty increased even more so.
All these points are the general locations you’ll find yourself in while roaming — in between fighting or wanting to help the server in a small way.
So, how to be a proper roamer?
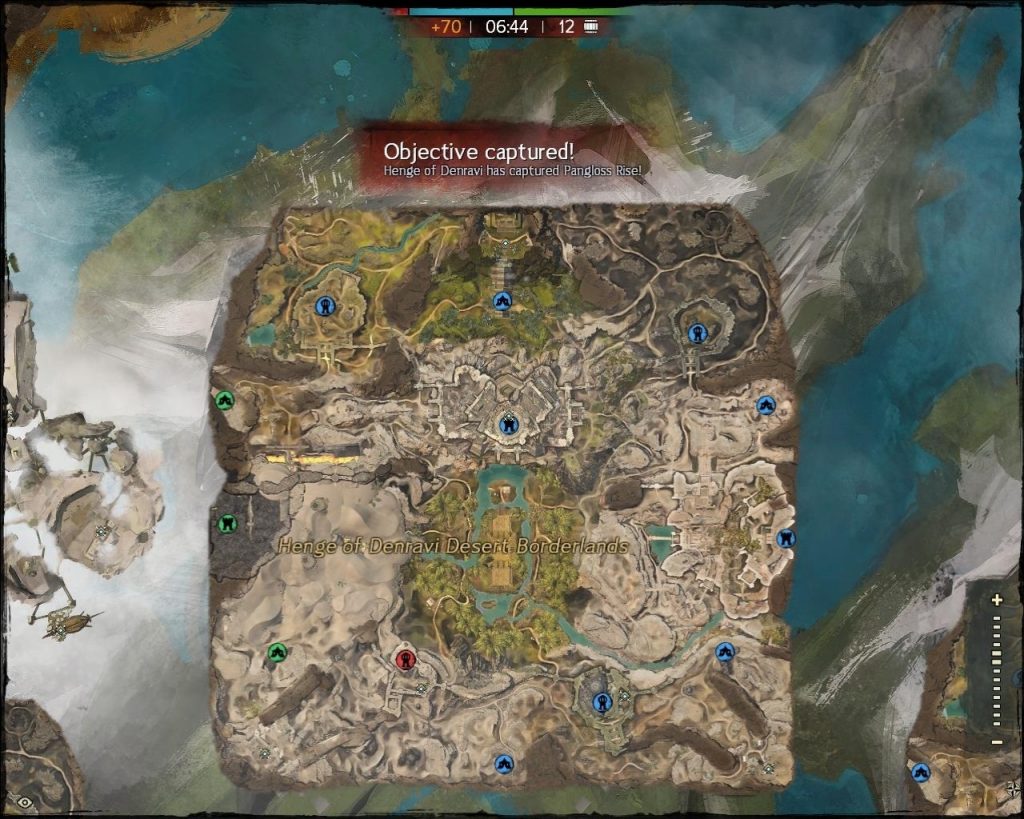
Know the Map
Many would tell you that having a roaming build is your top priority. While it is a big deal, I think they forget one thing: know your map. Your build is useless if you can’t find yourself from point A to point B, because you can easily take a wrong turn and end up in a very sorry place. Of course, knowing your map is a relatively simple skill, which is why it’s easily forgotten for those that have been playing WvW for years. For the newbies that have never roamed or navigated anywhere without a commander on the map, knowing how to move around through the eyes of a soloist adds to your survival. (More on that with a guide on how to scout.)
Build
The next priority is your build. For the most part, the build you have for a large group is pretty useless when you’re on your own or with one other person (with variation). Survival when roaming comes from you and only unless you have a buddy with you and they have some group support skills in their build. These large-group builds are focused on other people bringing support, heals, or damage; builds that have synergy with one another. Ever wonder why Thieves and Rangers tend to not be in these groups or never get put in a good sub-squad? Because they don’t add much to groups, regardless of their build (your exceptions are Staff Daredevil and Melee-centered Soulbeast, but they are a dime in a dozen and even fewer among guild groups).
So what makes a good roaming build? First off, going full Berserker stats makes you a full-glass cannon. Unless you’re in a profession that can utilize this with little issue through trait lines (such as a warrior) or have enough personal skill to pull it off, don’t do that. Going glass cannon will often kill you when roaming. Sure, you’ll hit really hard, but get enough damaging conditions on you or get one well-timed burst from the enemy and you’re turned into a bag. To remedy this, if you’re a power-based build go with Marauder, mixing in some toughness or changing some things to Berserker depending on profession and personal tastes. If you’re condition-based, Dire, Wanderer, and Trailblazer are common picks, so mix and match as you see fit.
Next, your traits should synergy with one another. There’s no point in taking a shortbow trait if you aren’t wielding a shortbow on either weapon set. The same for having an ax trait if you aren’t wielding an ax. There are weapon traits that have a weapon-based utility and general utility mixed in (such as a Revenant’s shield/damage reduction trait under Herald), so be mindful of this. Another example of trait synergy would be to take a stance trait if your build has a lot of stances, or a meditation trait if you have a lot of meditations, etc.
In short: your traits serve a purpose. Pick them wisely. They can make or break a build.
Some things to consider: Where does your self-sustain come from? Is there a trait that complements it? Is there a weapon set that helps you survive? Ask yourself these questions because there’s often a tradeoff happening. You might have everything build for damage, but that makes you that much easier to kill. Likewise with having all the sustain but none of the damage or utility. Yes, sometimes sustain isn’t all it’s cracked up to be.
Some examples of common builds and their origins of sustain:
- Most warriors: Stances and the passive heal signet are their sustain. They also often run shield for the blocks and a trait that gives them heal-over-time for landing burst skills. Countered by all these cooldowns and dodging their burst skills. However, one of the easier professions learn and roam on.
- Thieves: Most of the time it’s either all their evades or using dagger/pistol on one set to give them stealth. Can also kite easily and create distance. Tend to be vulnerable to ranged burst attacks.
- Mesmer: Both the power and condition variants tend to have access to blinks and stealth. They also have decent kiting abilities. The power variants are countered by dodging at the right moment. I will not tell you about the condition variant because it certainly needs some fixing.
- Guardian: Has a lot of condition removal and self-healing if they run a meditation trait. Their virtues make them a solid, easier to play roamer like the warrior, but with more active defense than passive. If they don’t run meditation and are running Firebrand, they have all the sustain they need but still suffer from their inability to kite, which is inherent to all Guardians. Best out-of-the-box roamer if you used your lvl80 boost on one, you just need to swap a few traits.
- Rangers: Essentially the same with Guardian, but has more range and kiting skills and an option to have access to stealth. Has many options for when sustaining against power damage or condition damage from the enemy, but sacrifices one or the other unless they want to play bunker.
- Elementalist (if running daggers or sword): Tends to come inherently with their water attunement. Earth Attunement is a possibility depending on their traits.
- Engineer: All the kits. All the fields. Downside is all the buttons. Holosmith tends to be a better roaming option for Engineers.
- Revenant: Glint (Dragon stance)/Shiro (Assassin stance) are the two Legends that people tend to run. Most of it is burst-oriented, so survival is all about timing your dodges and knowing when to use your heal skills and weapon skills. The flip skill on the Glint heal is your “Oh no!” button for when you are low and know there is a burst about to happen since it converts all damage into healing, potentially healing you to your full health easily. The Shiro heal is a lot smaller, and the healing is relatively okay; best used for setting up for a burst, however. Very vulnerable to conditions.
- Necromancer: One of the hardest professions to roam on, but their sustain comes from when they are in shroud or their barriers if they are a Scourge. Easily kited away from and very vulnerable to ranged opponents.
Of course, you might have a build that isn’t common, and their strengths and weaknesses will vary. For the most part, knowing your profession inside and out can help you swap traits and skills out on the fly to adapt to whatever situation you might find yourself in. If you are noticing more condition builds out there, bringing condition removal skills will help. If you notice people are tending to be more burst-oriented, learning to dodge their important skills and putting on some damage-mitigation traits would be the way to go. If you’re trying to solo a tower or keep, ensure that you have enough damage (either power or condition) and self-sustain. Those tower and keep lords can be easily underestimated by newer roamers.
In short: Find a balance between damage and self-sustain. Know your profession. Play things to your tastes. If you find yourself dying too much, be willing to adjust things as needed.
Also, using resources like metabattle.com and looking in the WvW section for something that isn’t a zerg/group build is also a good option for where to start. They don’t get updated often, but they do give ideas for what a decent-to-good build looks like.
How to Help Your Team
For the most part, roamers can be a very vital part of helping your team, only if they do the following: scouting, defending, capping the ruins, and refreshing siege. It’s good to do these things in between fighting against an enemy. In a later guide, I’ll give an explanation of how to scout effectively (since that one can get a little lengthy); but I can give you a rundown of the others. Killing enemies is fun and rewarding, but oftentimes it’s a selfish endeavor. Mixing in the following methods to the madness can make or break a matchup.
Defending can come in many different forms. The most common form that this will come up is defending a camp. Camps are seemingly unimportant if all you’ve done in the past is follow a large group of people to take keeps and garrisons and such. However, they are the main source of the creation and flow of supply for your team. Supply can rebuild walls and build siege. Camps also send out Dolyaks (”dollies” or “yaks” for short) that travel from the camp to a keep or tower. If a certain number of yaks make it to an objective, the fortifications of that place will increase, making it harder for enemies to take from your team. So, defend everything if you can, and don’t sweat it too much if you can’t. In those cases, it’s good to call out for help — but how to effectively call out for help will come with the scouting guide.
To defend an objective, merely kill whoever tries to take it. If you manage to kill your enemy inside the camp, you get additional experience for when the “Defend the Objective” timer runs out. You’ll know when someone is trying to attack a camp when you see the objective icon (camps, keeps, and towers have these) with crossed, white swords on it. They only disappear when the attackers are gone and the “Defend the Objective” event times out. The caveat to this is that those swords on the icon only appear after thirty seconds. If your enemy can take down a camp within thirty seconds, it can flip with little to no warning; so don’t only rely on the map for when you think an objective needs someone to head there to defend. Go with your gut sometimes and just run by and check.
To cap the ruins, it’s best done with at least three people; two if one of you can manage watching two ruins. The ruins are the five zones in the middle of the map, and to capture it, simply stand in it until it changes to your team color. Capping at least three will give your entire team Bloodlust, which boosts everyone’s stats by a small amount and awards more points to your team every time you use a finisher on a downed enemy. Going solo doesn’t mean too much. Just one point? And the bonus to your stats doesn’t feel like a lot. However, if you take into consideration if your team has a large group out there fighting, this can compound into the hundreds or thousands of added points in a skirmish. The reason why roamers are the best for capping the ruins is that, if your larger group is out there fighting and their group composition is reliant that everyone needs to stick together, they can’t spare the two or three to cap Bloodlust. Add onto the likely fact that those people’s builds aren’t meant for solo or small-group play, and they’ll face a losing battle if a roaming enemy happens upon them. An easy kill for the enemy team at the detriment of your own larger forces.
Lastly, refreshing siege. In a keep, tower, and sometimes in a camp, you’ll find siege built by your allies to help defend it from enemies. If your team is greatly outnumbered, but your team has a defensive siege inside, it can help level the playing field and give your team a fighting chance to defend. Otherwise, it’s likely a lost cause if you don’t have a group of what they call a “zerg-buster,” people skilled enough to fight largely outnumbered forces with fewer people. Such groups are few and far between these days. Is there siege built at your garrison? Great! But did you know that siege doesn’t stay there forever? There are two things that get rid of siege: enemies destroying it, or they time out on their own if they haven’t been used within an hour.
The latter instance happens more often than not and is what makes off-hours coverage (when most large groups are asleep) a killer. This is called a “siege decay timer.” To reset this timer, simply walk up to the siege and interact with it. It’ll change your weapon skills into the siege’s abilities. No need to use any of the skills. And then, leave the siege. The one-hour timer has been reset to its maximum time. Do this with any siege you can see within a friendly objective, and that objective will be properly sieged-up for the next hour. I suggest doing this every thirty to forty minutes to each garrison, keep, tower, etc. that your team owns that has any siege in it. While you don’t get much out of it, it also doesn’t take much time to do it. The only siege exceptions that don’t decay on their own are mortars, cannons, and burning oils.
Refreshing siege is the one thing that I notice many roamers don’t bother to do, either due to ignorance or because they don’t care much for doing it. Sure, it’s tedious sometimes, but it’s at least once within the hour of the decay timer. Surely you can take a break from all the enemy-killing and make sure the siege is still there? I do hope that after reading this guide you’ll see the importance of siege.
Concluding Statements
Roaming, while not everyone’s cup of tea, can be as helpful and rewarding as following a commander of a large group for your team. Learning to fight for yourself and learning to work together both takes practice and skill, as well as a little bit of self-sacrifice to set you apart from the rest. If you keep some of these basic tips in mind, you can learn to enjoy the simple pleasures of running around on your lonesome, taking small objectives, and maybe even strengthen your own fighting skills.
And seriously, if I see another roamer walk past an arrow cart with only five minutes left before it despawns, expect a long post ranting about people who don’t refresh siege.
Got any more tips and tricks that you feel should be in here? Feel free to leave a comment so that they can show up in future edits!